
All-on-4 Procedure Steps: From 3D Scan to Final Bridge
Find out what happens at each stage of All-on-4 treatment, from the first consultation and 3D scan to surgery, temporary teeth, healing and the fitting of your final fixed bridge.
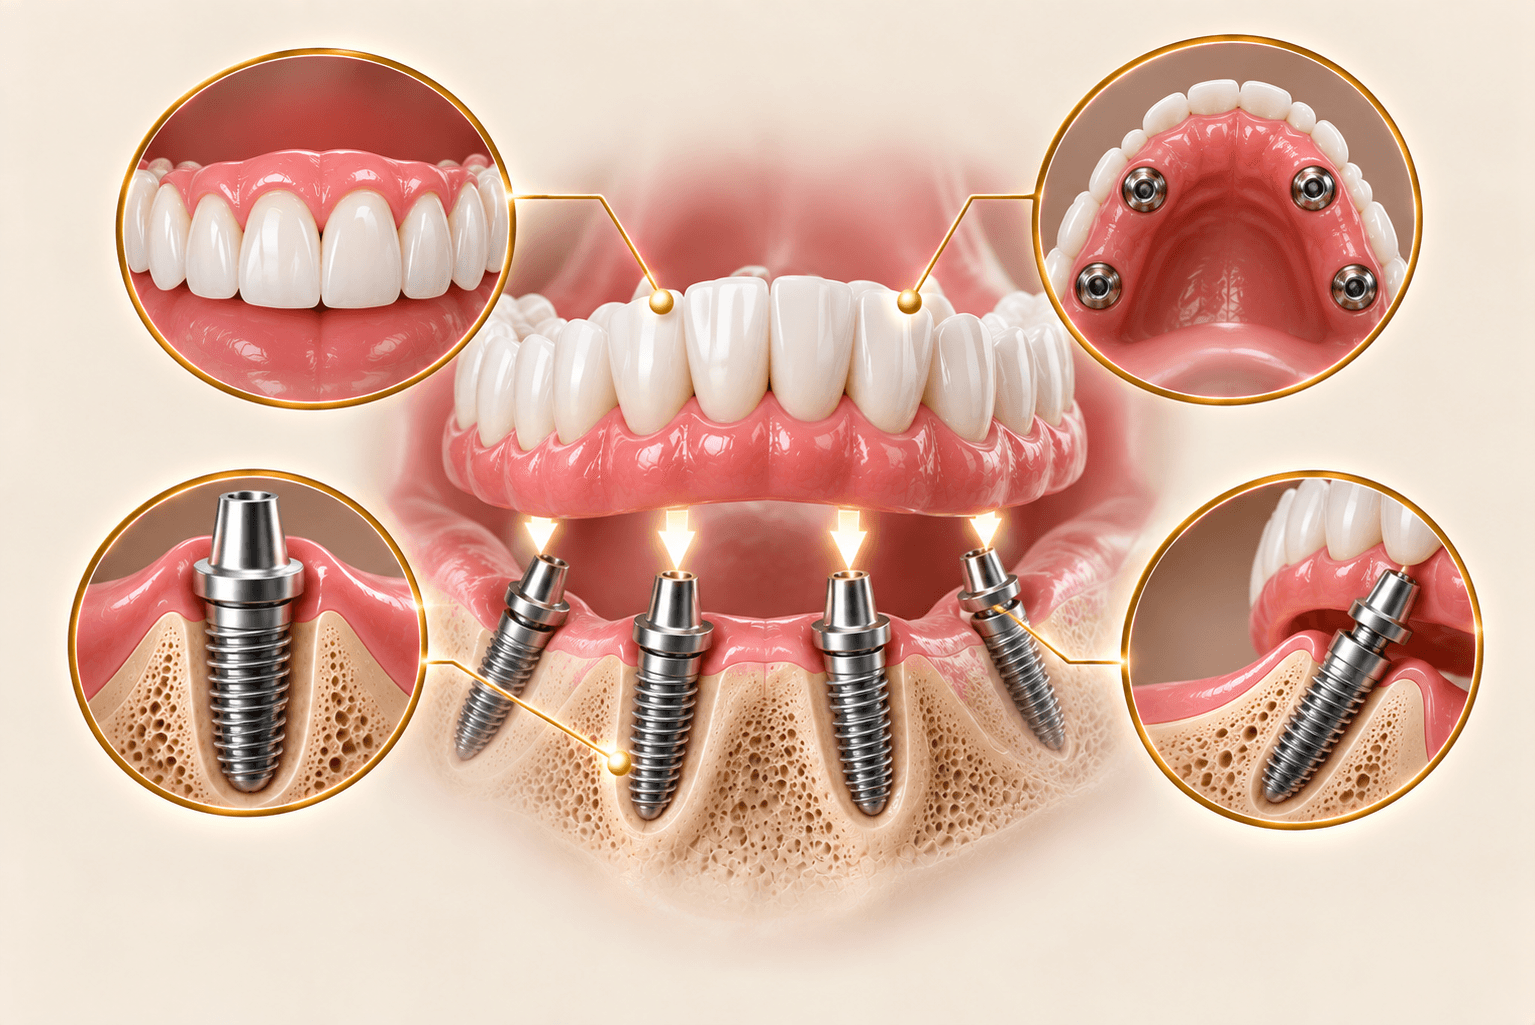
If you are thinking about replacing a full arch of missing or failing teeth, knowing what lies ahead can make the whole journey feel more manageable. All-on-4 dental implants use four implants in the jawbone to hold a fixed bridge, so you are not relying on a removable denture. This guide walks you through the typical all-on-4 procedure steps, from the first 3D scan to the moment your final bridge is fitted.
Every treatment plan is individual. The order of steps described here is a common pattern, but your dentist will explain what applies to you, how long each stage may take in your case, and whether All-on-4 is a suitable option at all.
Step 1: Consultation, 3D Scan and Treatment Planning
Everything starts with planning. This stage is where the dentist works out whether All-on-4 is right for you and how the implants should be placed.
A planning appointment usually includes:
- An examination of your mouth, gums, remaining teeth and bite
- X-rays or a CT scan, which gives a 3D view of your jawbone
- A review of your medical history, including any medicines you take
- A conversation about your goals, such as how you want your teeth to look and feel
The 3D scan matters because it shows the amount and quality of bone in your jaw. With All-on-4, the two back implants are often angled to make the most of the bone that is available, which can reduce the need for bone grafting in some patients. If there is not enough bone, the dentist may suggest a different approach, such as bone grafting, more implants or another type of implant.
The dentist will also look at factors that can affect healing, for example uncontrolled diabetes, smoking, medicines that affect bone or blood clotting, and teeth grinding. Being open about your health at this stage helps the team plan safely.
Step 2: Surgery Day and Implant Placement
All-on-4 is normally an outpatient procedure, which means you go home the same day. It is usually done under local anaesthesia, often with sedation, and sometimes under general anaesthesia. Your dentist will discuss which option suits you.
On the day of surgery, the main all-on-4 procedure steps are typically:
- Removing any remaining teeth that cannot be saved
- Preparing the jawbone where the implants will go
- Placing two straight implants at the front of the jaw
- Placing two angled implants further back, using the available bone
- Closing and protecting the gum around the implants
Having a clear picture of this sequence beforehand can help ease nerves. Ask your clinic what to eat beforehand, whether you need someone to accompany you, and what to bring.
Step 3: Fitting the Temporary Bridge
In many cases, a temporary fixed bridge is attached soon after surgery, as long as the implants are stable enough. This provisional bridge is lighter than the final one. It lets you leave with fixed teeth while the implants heal underneath.
A few things are worth knowing about the temporary bridge:
- It is designed for the healing phase, not for long-term use
- You will usually need to stick to soft foods and avoid chewing anything hard on it
- It can wear or break, so following your dentist's advice on eating is important
- Not every patient receives one immediately; this depends on how stable the implants are
Step 4: Healing While the Implants Bond With the Bone
This is often the longest part of treatment. Over a period of months, the implants gradually bond with the jawbone. This process is what gives them the stability needed to carry the final bridge.
In the first days after surgery, most people have swelling, some bruising and discomfort. This is usually managed with medicines prescribed by the dentist. Helpful habits during this phase include:
- Resting after surgery and following all aftercare instructions
- Using cold packs and taking medicines exactly as prescribed
- Eating soft foods
- Keeping the area clean as instructed, often with gentle rinses
- Avoiding smoking, as it can slow healing
- Attending every check-up, including remote follow-ups if you have travelled
How quickly you recover differs from person to person, so try not to compare your progress with someone else's.
Step 5: Fitting the Final Bridge
Once the implants have healed, the final bridge is made. It is stronger and custom-made for you. The dentist takes new impressions or scans, checks the fit, and adjusts your bite so that chewing feels balanced.
Final bridges can be made from different materials, such as acrylic, composite, zirconia or a metal framework. Your dentist can explain the pros and cons of each for your situation.
After the final bridge is fitted, long-term care becomes part of daily life:
- Daily cleaning around the bridge and implants, as shown by your dental team
- Regular professional check-ups, just as you would have for natural teeth
- Telling your dentist early if anything feels loose, sore or different
Thorough cleaning matters because gum inflammation around implants, known as peri-implantitis, can develop if plaque builds up.
How the Steps Fit Together When You Travel Abroad
If you have treatment abroad, the stages are often spread over two trips. The first trip usually covers planning, surgery and the temporary bridge. The second trip, after the healing period, is for the final bridge and bite adjustments.
Before booking, it helps to ask:
- Who will carry out the surgery, and how much experience do they have with full-arch implants?
- Is a 3D scan part of the planning?
- Which implant system is used, and can it be serviced in your home country?
- How many trips are needed, and how long should you plan to stay?
- How is follow-up handled once you are back home?
Costs depend on your individual plan and can only be confirmed after an examination. Asking for a written breakdown makes it easier to see what each quote includes.
When to Talk to a Doctor
All-on-4 is an established treatment, but like any surgery it carries risks. These can include infection, implants that do not fuse with the bone, nerve irritation causing numbness or tingling, sinus problems with upper jaw implants, and wear or breakage of the bridge. Good planning and careful aftercare help lower these risks, but no clinic can rule them out completely.
Contact your dentist or clinic promptly if you notice:
- Pain or swelling that gets worse instead of better
- Fever, pus or a bad taste that could suggest infection
- Bleeding that does not settle
- Numbness or tingling in the lip or chin that does not go away
- A bridge or implant that feels loose or cracked
If you have a long-term health condition or take regular medication, talk to your own doctor before treatment too. Suitability, recovery and risks differ for everyone and should always be discussed with the treating dentist.
When you feel ready to explore your options, you can compare verified clinics, read about their planning and aftercare, and send one free request so clinics can contact you with their suggestions. Learn more on our All-on-4 dental implants treatment page and take your time choosing the clinic that feels right for you.